<form> </form>
The form tag, in its simplest terms, is the tag covering the form field we want to create. All form tags are written between the form.
<label> </label>
The label tag is used as a label. You can review the code sample below the input description below.
<input> </input>
The input tag is a tag that stands for input. We use it to send user-entered data to our server. inputs are fields where we enter or select the data we want to send to our server.
The input tag has various properties and formats. The point to be considered in the following coding is the input tag’s type = ”” feature. The type = ”” property of the input tag is used to determine the type of the data entry field.
In our codes below, type = “submit” is a feature that we will use to send the data we enter to our server, and the “value” property determines the text that will appear on the button we provide this post.
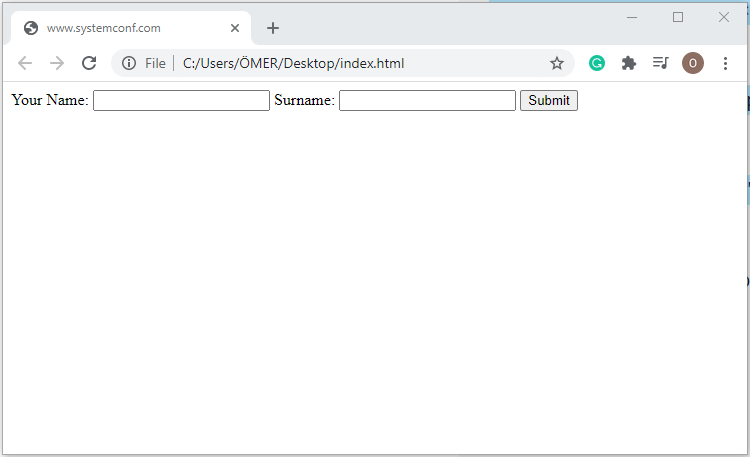
The output of our codes will be as follows.
<form>
<label> Your Name: </label> <input type = "text">

<label> Surname: </label> <input type = "text">

<input type = "button" value = "Submit">
</form>

<fieldset> </fieldset> and <legend> </legend>
The fieldset tag is a tag that encloses the form tags it covers. The title part of this frame is encoded with the legend tag.
The output of our codes will be as follows.
<form>

<fieldset>

<legend> fieldset / legend Example </legend>
<label> Your Name Last Name </label> <input type = "text">
<label> Date of Birth: </label> <input type = "text">
<label> Your E-Mail Address: </label> <input type = "text">
<input type = "submit" value = "Submit">
<input type = "reset" value = "Clear">

</fieldset>

</form>

Note: The type = “reset” feature, which is a feature of the inputs in our codes, serves to clear the form of information you have filled. You can see it by trying it out in our printout.
<textarea> </textarea>
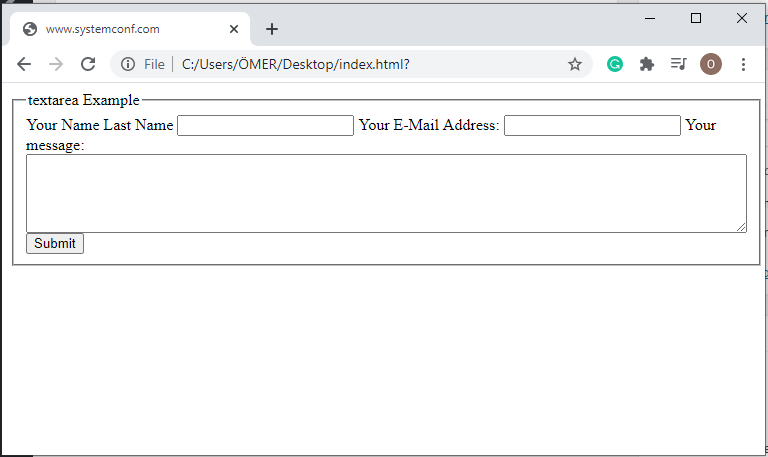
We can say textarea is the broad version of type = “text” we learned above. You can adjust the text field to the size you want. You may have encountered while registering on sites before. In sections such as Description, About, Tell yourself, there is this field and we write the text there. We created a textarea that is 5 rows high and 100 columns wide. In textarea usage, we can size the text field with row and column properties. Our output will be as follows.
<form>


<fieldset>
<legend> textarea Example </legend>
<label> Your Name Last Name </label> <input type = "text">
<label> Your E-Mail Address: </label> <input type = "text">
<label> Your message: </label> <textarea rows = "5" cols = "100"> </textarea>
<input type = "submit" value = "Submit">

</fieldset>

</form>

<select> </select> / <option> </option>
The Select tag allows us to create a drop-down menu and we specify the options in this menu with the option tag. Let’s see it in our Codes below. Our output will be as follows.
<form>

<fieldset>
<legend> select / option Example </legend>
<label> Your Name Last Name </label> <input type = "text">
<label> Your E-Mail Address: </label> <input type = "text">
<label> Your team: </label> <select>

<option> Fenerbahce </option>

<option> Galatasaray </option>

<option> Real Madrid </option>

<option> Arsenal </option>

<option> Manchester City </option>

<option>  Barcelona </option>

<option> Liverpool </option>

</select>
<input type = "submit" value = "Submit">

</fieldset>

</form>

<optgroup> </optgroup>
The task of this tag can be thought of as grouping option options inside the select tag. Let’s check out by writing an example code.
<form>


<fieldset>
<legend> optgroup Example </legend>
<label> Your Name Last Name </label> <input type = "text">
<label> Your E-Mail Address: </label> <input type = "text">
<label> Your city </label> <select value = "Select">


<option> Marmara Region </option>
<optgroup>


<option> Edirne </option>

<option> Kocaeli </option>

<option> Istanbul </option>

<option> Bursa </option>

</optgroup>

<option> Aegean Region </option>

<optgroup>

<option> Mugla </option>

<option> Izmir </option>

<option> Manisa </option>

<option> Aydin </option>
     </optgroup>
 </select>
<input type = "submit" value = "Submit">

</fieldset>

</form>


