 by
by DBAN(Darik’s Boot And Nuke) is a freeware that allows you to securely erase data on your hard drive. DBAN works on the command line but is pretty easy to use. All the tool does is replace the data on your hard drive with random data. To use DBAN, you must first download the ISO file from the website and burn it to a boot USB.
Deleting Data on Hard Disk with Example
You can see the disk wiping steps we did in the example below.
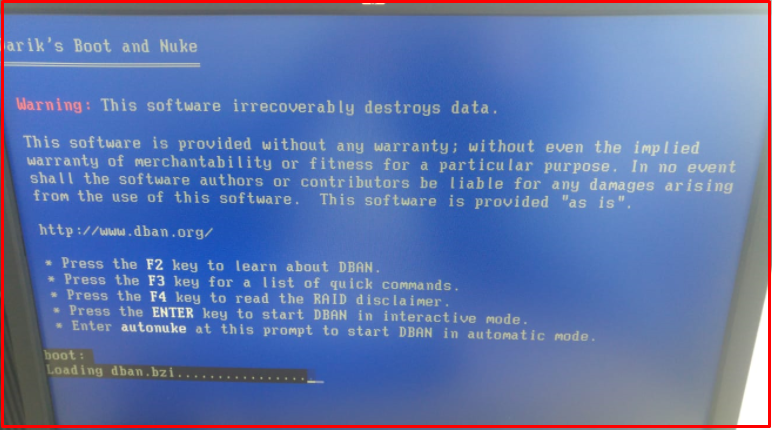
1. At first we “boot” the server from the “DBAN CD“.
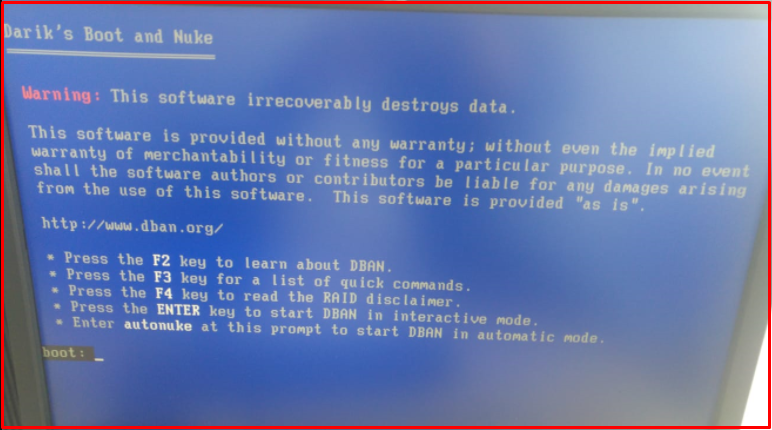
2. We pass the first DBAN screen with “Enter”.
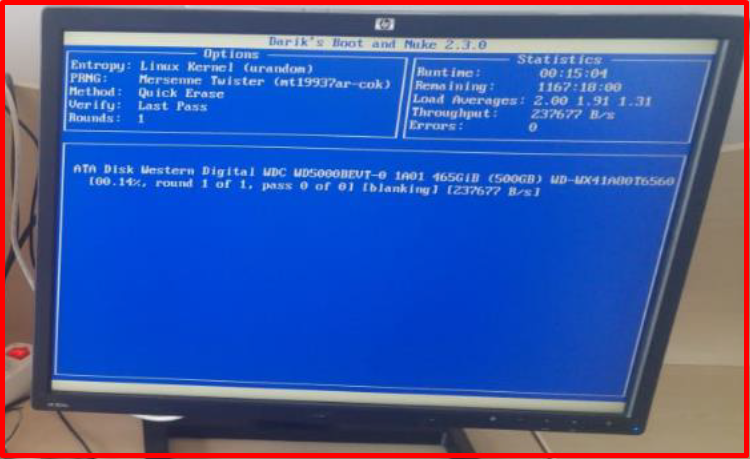
3. It will wait about 10 minutes in the PCI (sysfs) phase.

Note: If the following error is received, the reason may be deficiencies in the disk connection (Power, SATA / ATA).
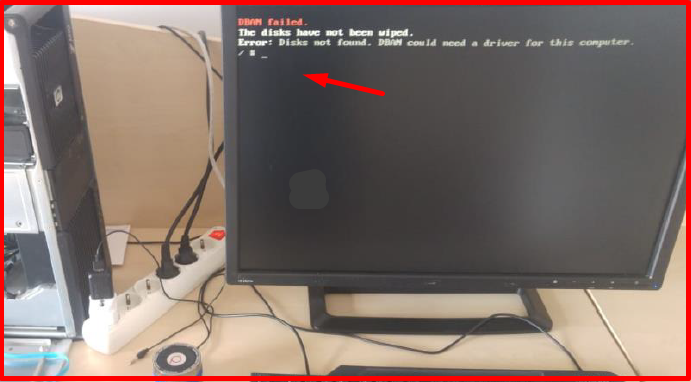
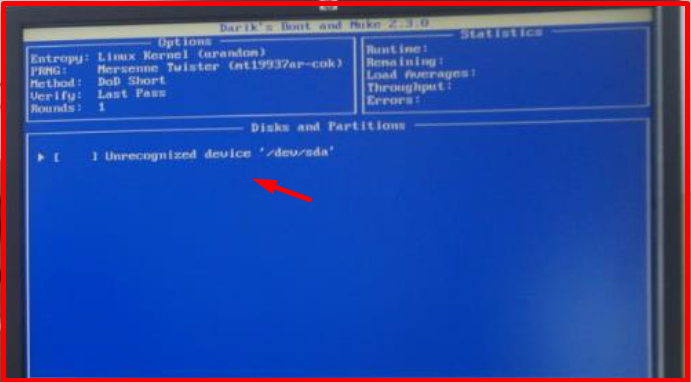
Note: If the following error is received, the reason may be that the disk is corrupt.
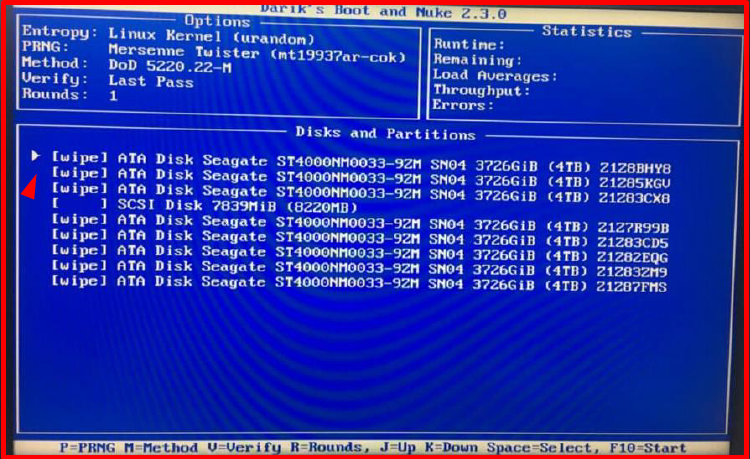
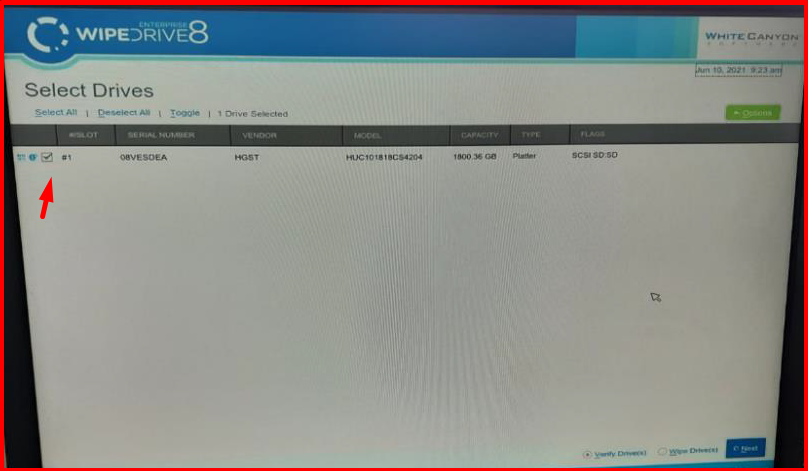
4. On the screen that comes up, we select the disk to be deleted with the space key.
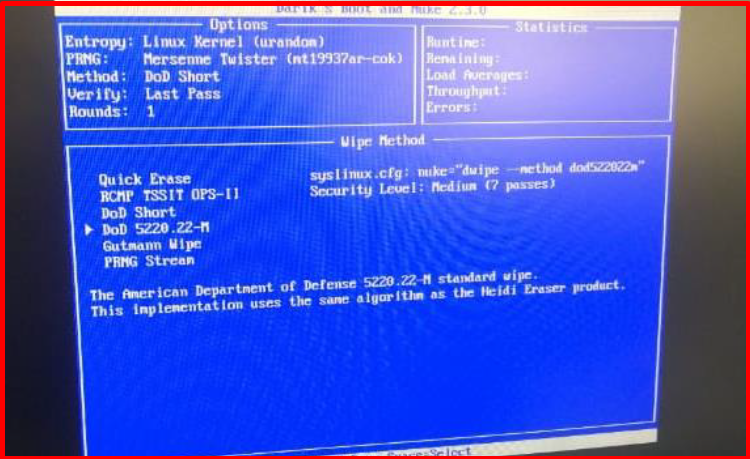
5. On the screen that comes up, we select the deletion method with the letter “M”. (DoD Short, Quick Erase etc.)
6. On the screen that comes up, we start the disk wiping process with the “F10” key. The estimated remaining time stated in the Statistics section may vary during the process.
Note: In the following situation, the disk wipe could not be completed because one of the disks has bad sectors.
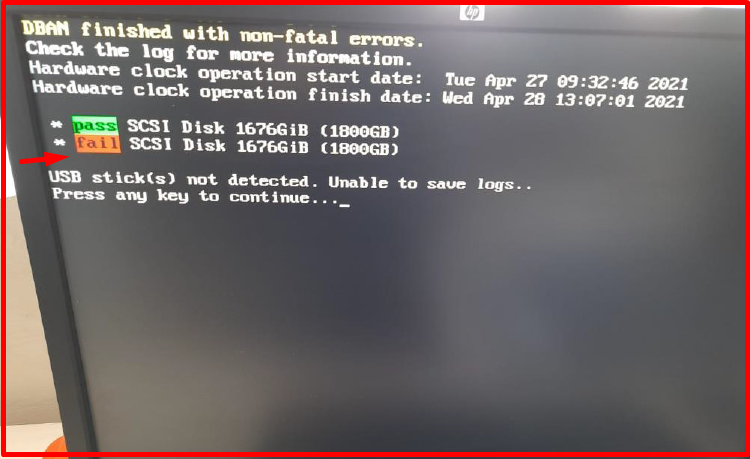
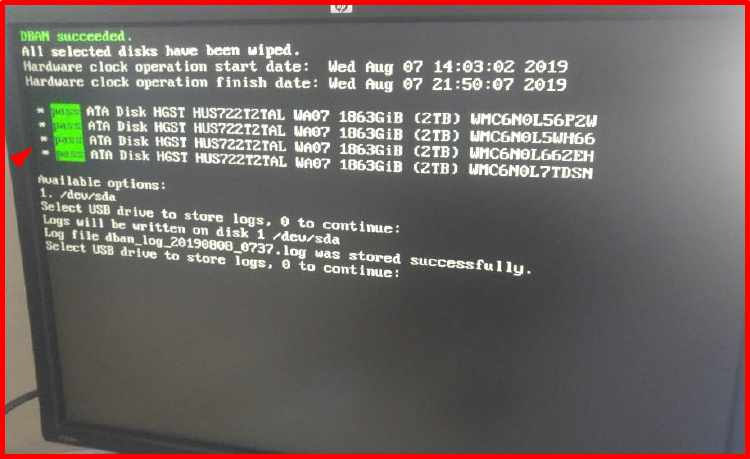
7. Disk wiping with DBAN is completed as follows.
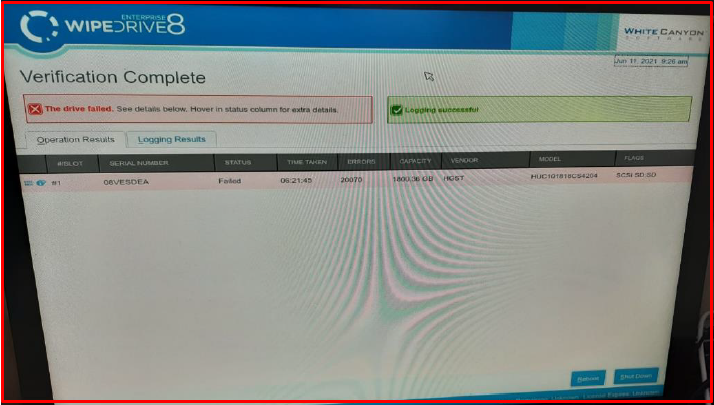
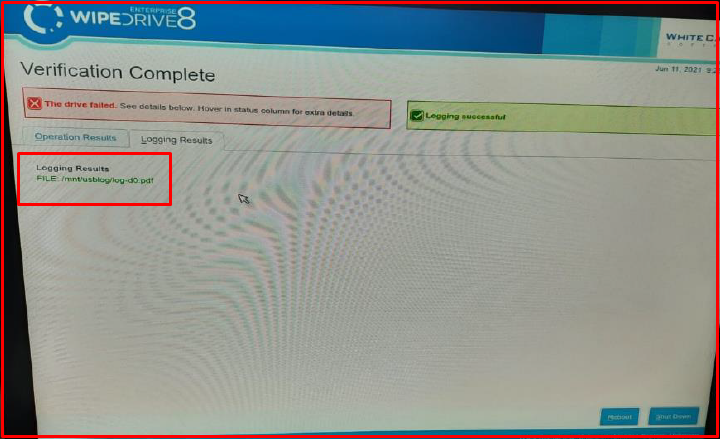
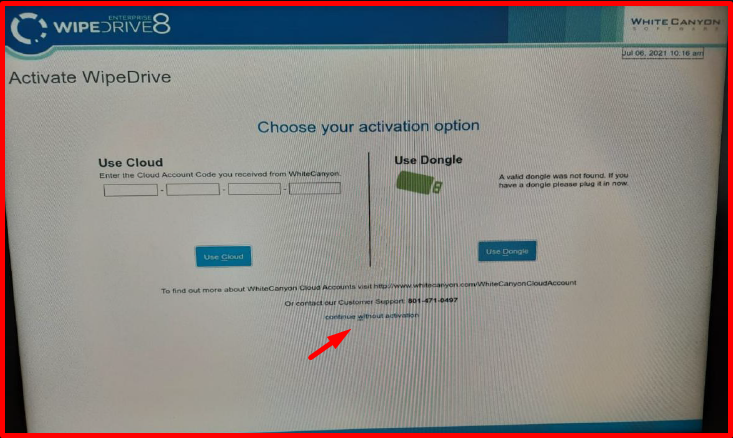
8. We use “WhiteCanyon WipeDrive CD” for the verification and reporting of erased discs. We boot again with the server “WipeDrive” software. In the meantime, a different USB formatted in FAT32 format to be used to save the reports must be plugged into the server. We pass “continue without activation” on the screen below. Activation code may be required in versions after “WipeDrive 8.3.1“. In this case, the code part can be passed by filling it with the letter “A“.
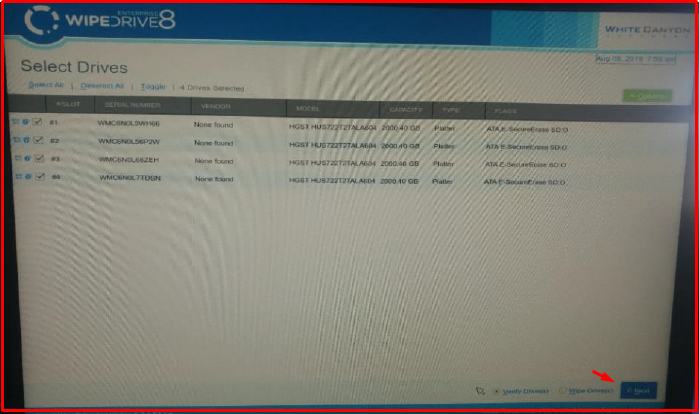
9. On the screen that comes up, we select the deleted disks and mark “Verify Drive(s)” as the action to be taken.
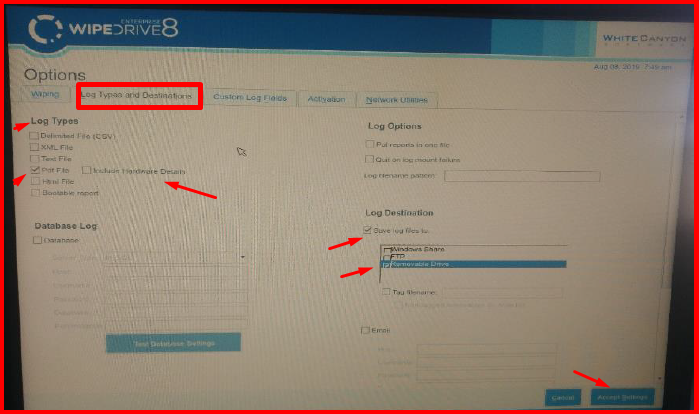
10. We are editing the report format from the “Options -> Log Types and Destinations” section. We specify the report format by selecting the “Pdf File” field from the “Log Types” section. “Include Hardware Details” contains details about the server and there is no need to select it. In order to save the verification report, We select “Save log files to” and “Removable Drive“. The space key can be used. We save with the “Accept Settings” button.
11. After the configuration processes are completed, we start the verification process with the “Next” button.
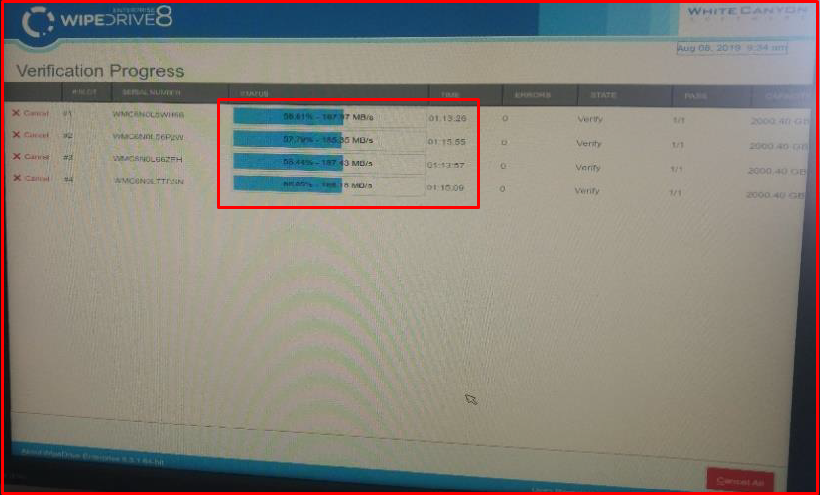
12. After the verification process is completed, you can check the media (USB) and files where the reports are saved on another computer.