 by
by We had made a disk configuration on the physical server we prepared for a project. We had 6 disks of the same size. We made them RAID 5 for redundancy. We had to add disks afterwards. We added another disk of the same size. In this disk, we need to add it to the space of other disks. Now we will do this by following the steps below.
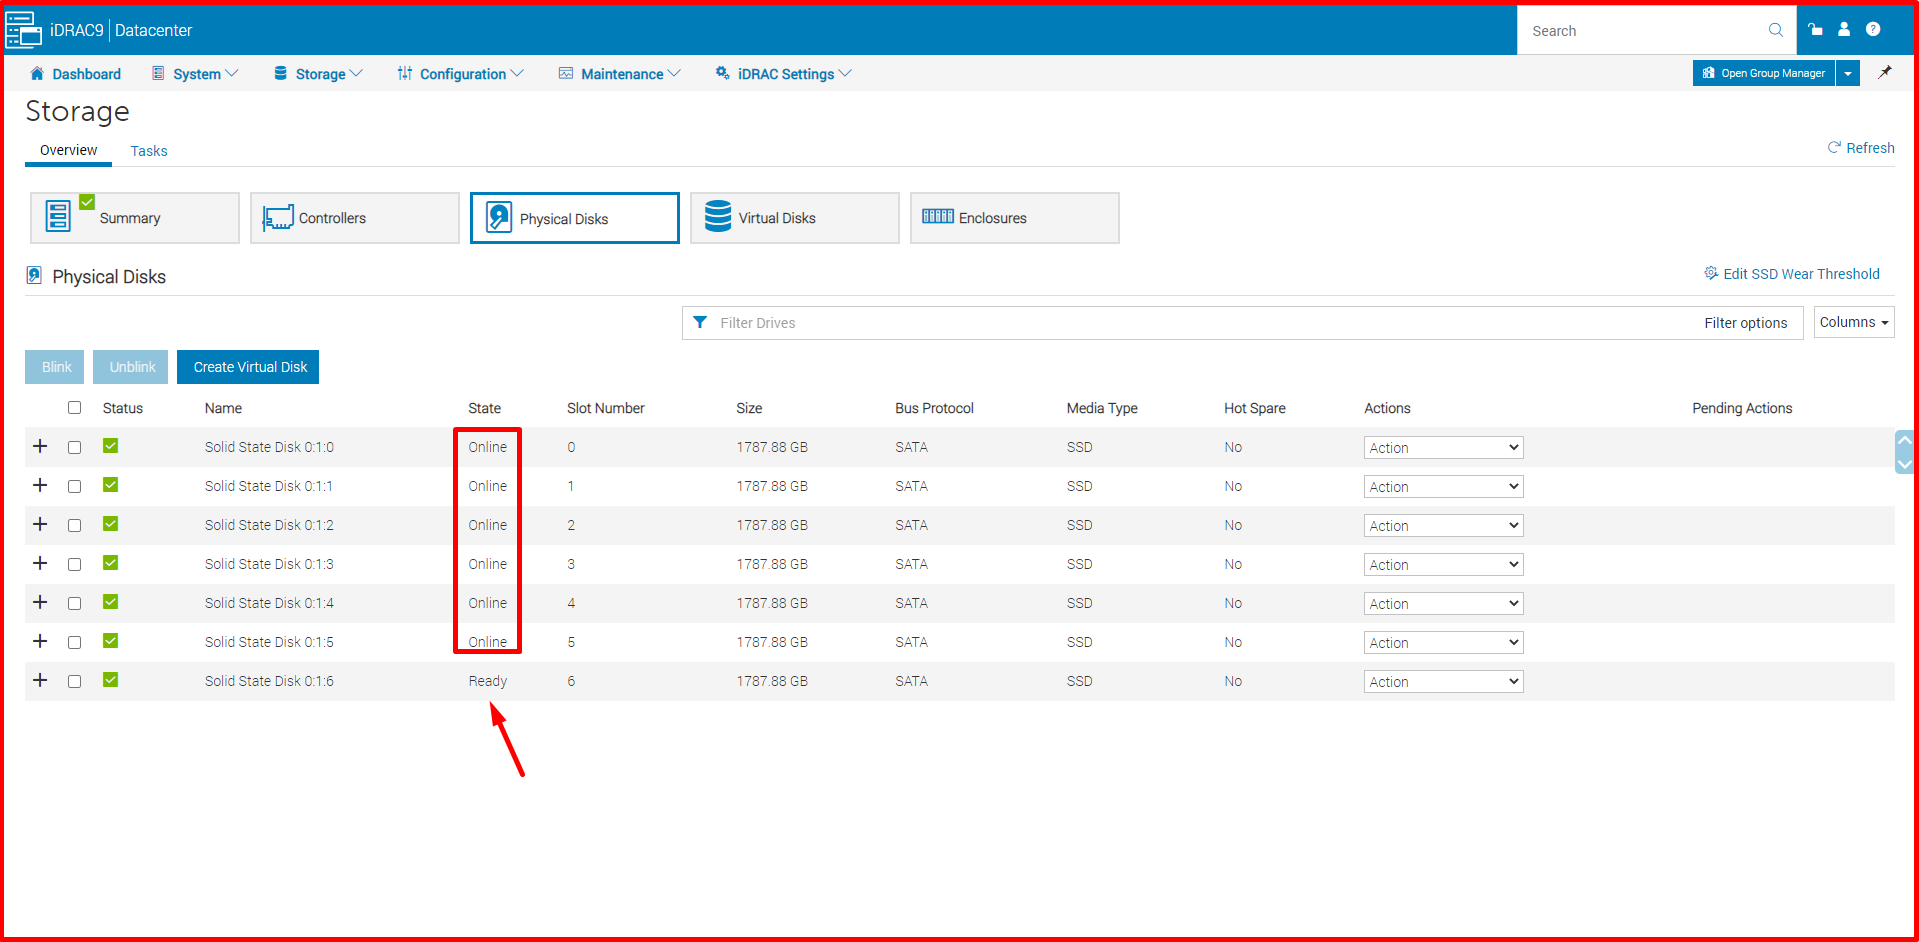
First, we were able to see the newly added disk by clicking “Storage -> Overview -> Physical Disks” from the IDRAC interface. “Solid State Disk 0.1.6” in the picture below is the disk we added later. The “State” status already appears as “Ready“.
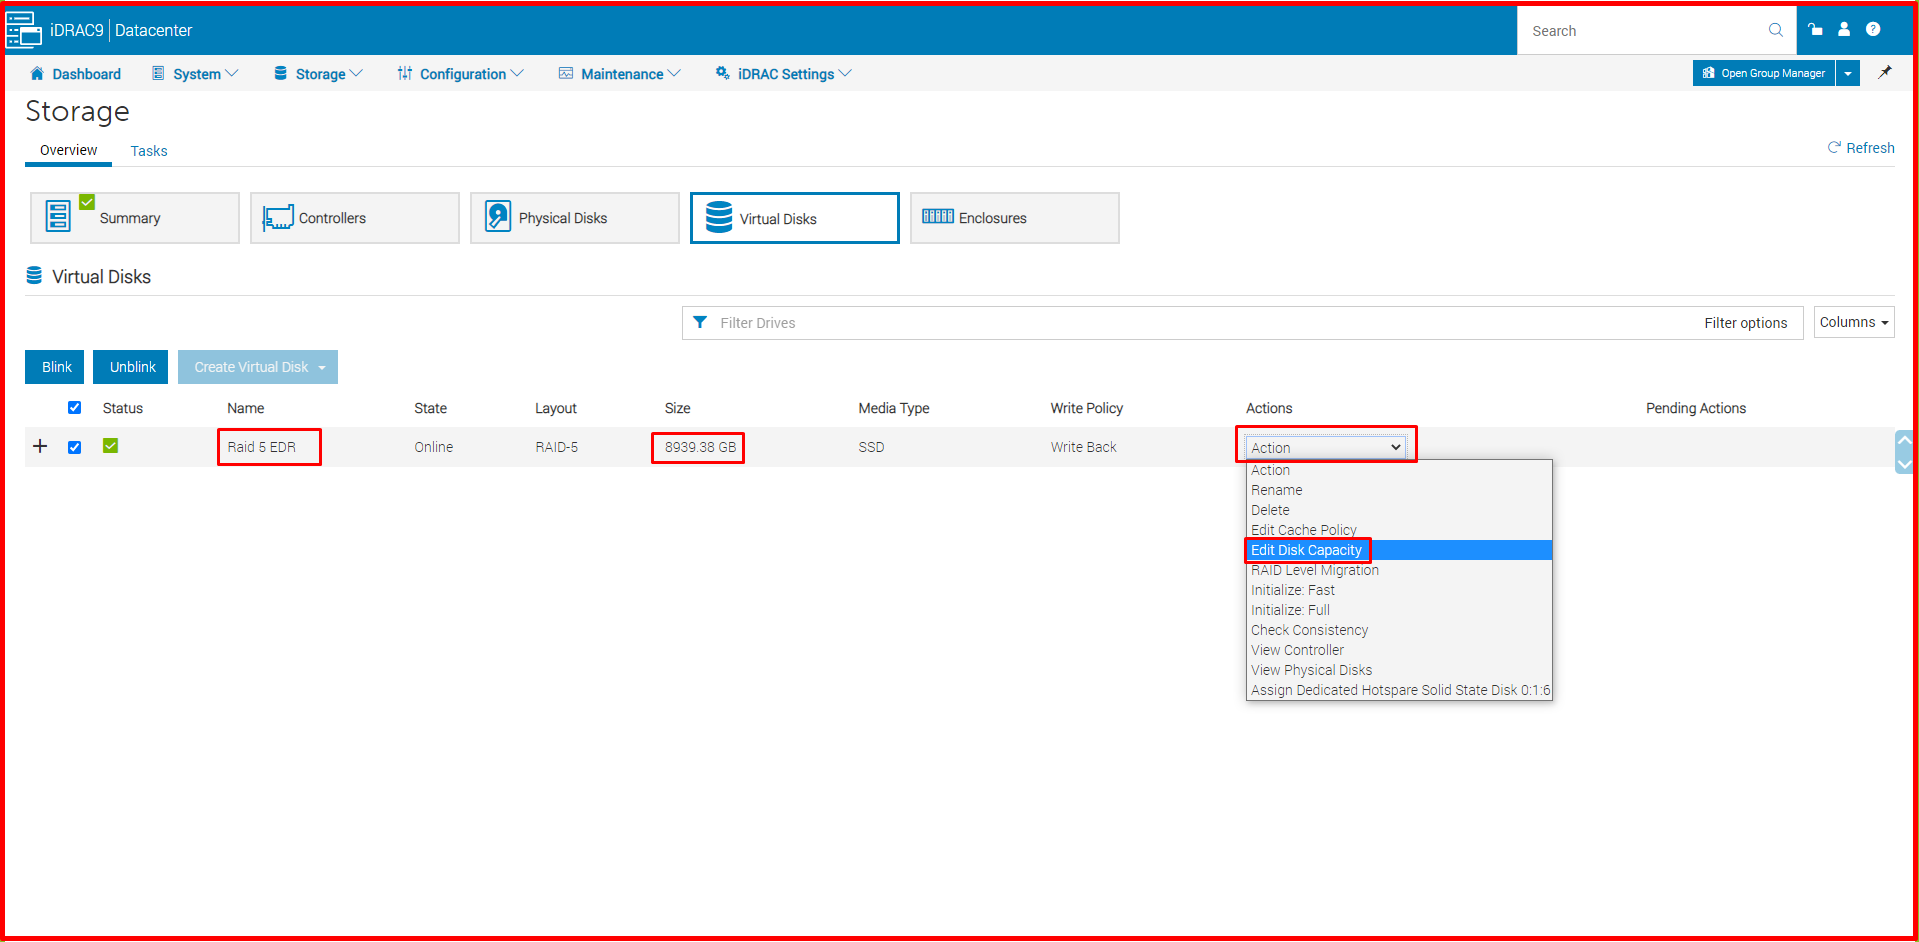
To add our disk named “Solid State Disk 0.1.6” that we added later, we select the disk on the “Storage -> Overview -> Virtual Disks” page. From the “Actions” section, click on the “Edit Disk Capacity” tab.
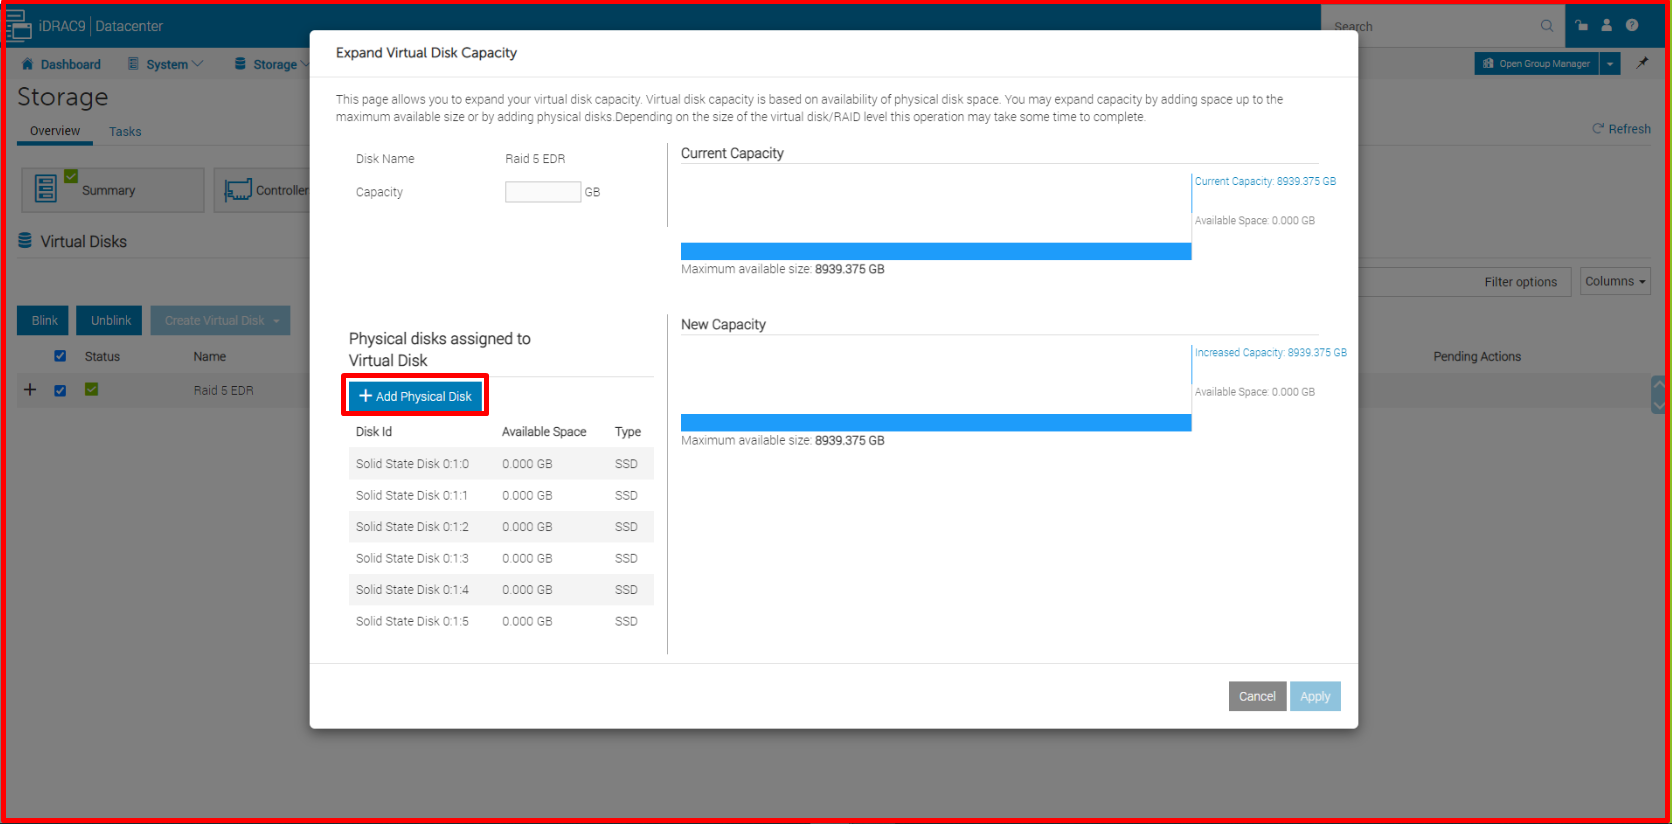
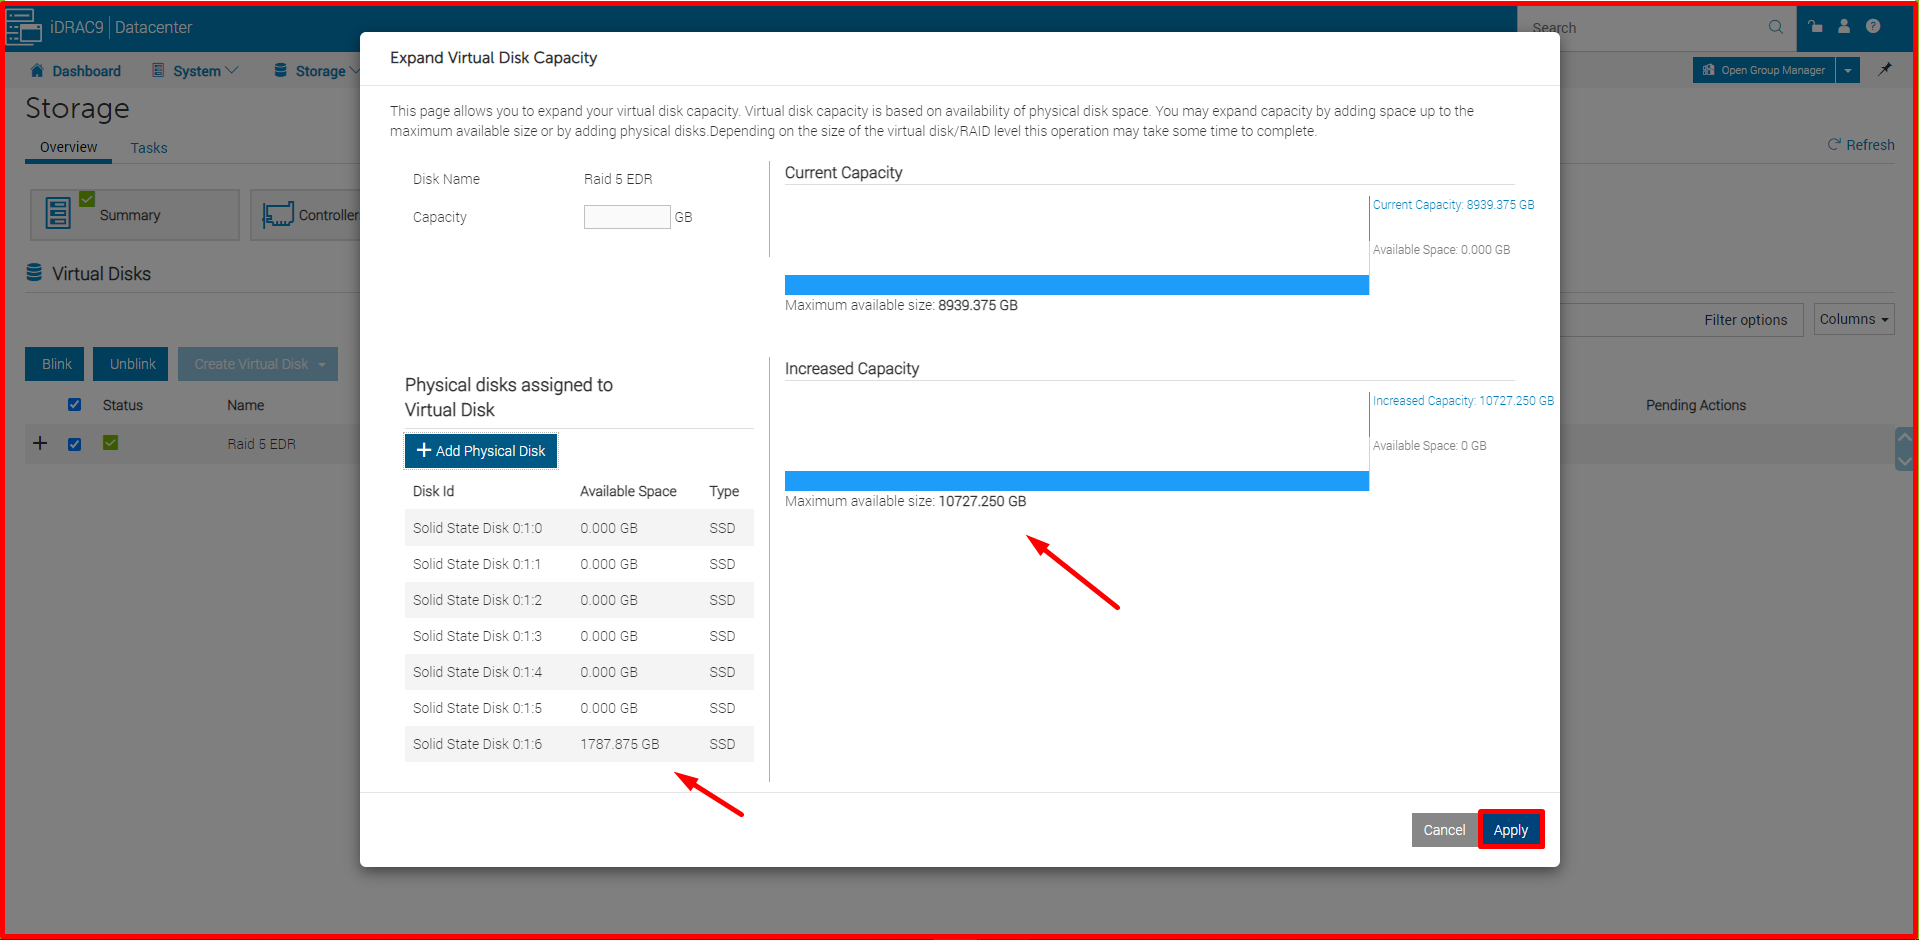
On the “Expand Virtual Disk Capacity” page, we click the “Add Physical Disk” button.
On the “Assign physical disks to virtual disk” page, we select our added disk. Click the “Add Disks” button.
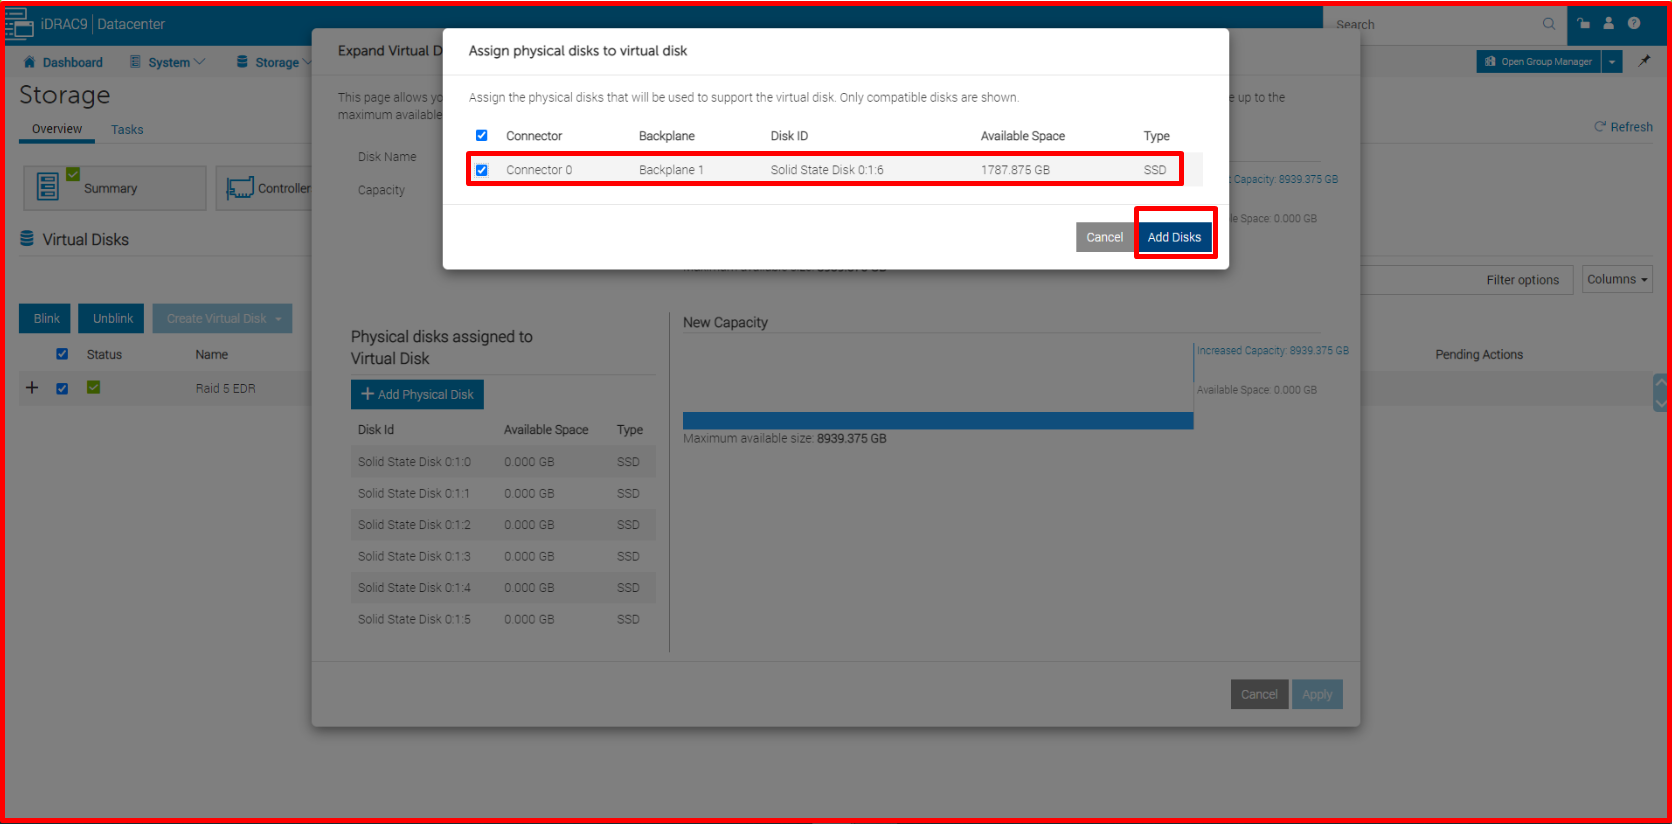
The disk we added appears as “Solid State Disk 0.1.6“. Confirm by clicking the “Apply” button.
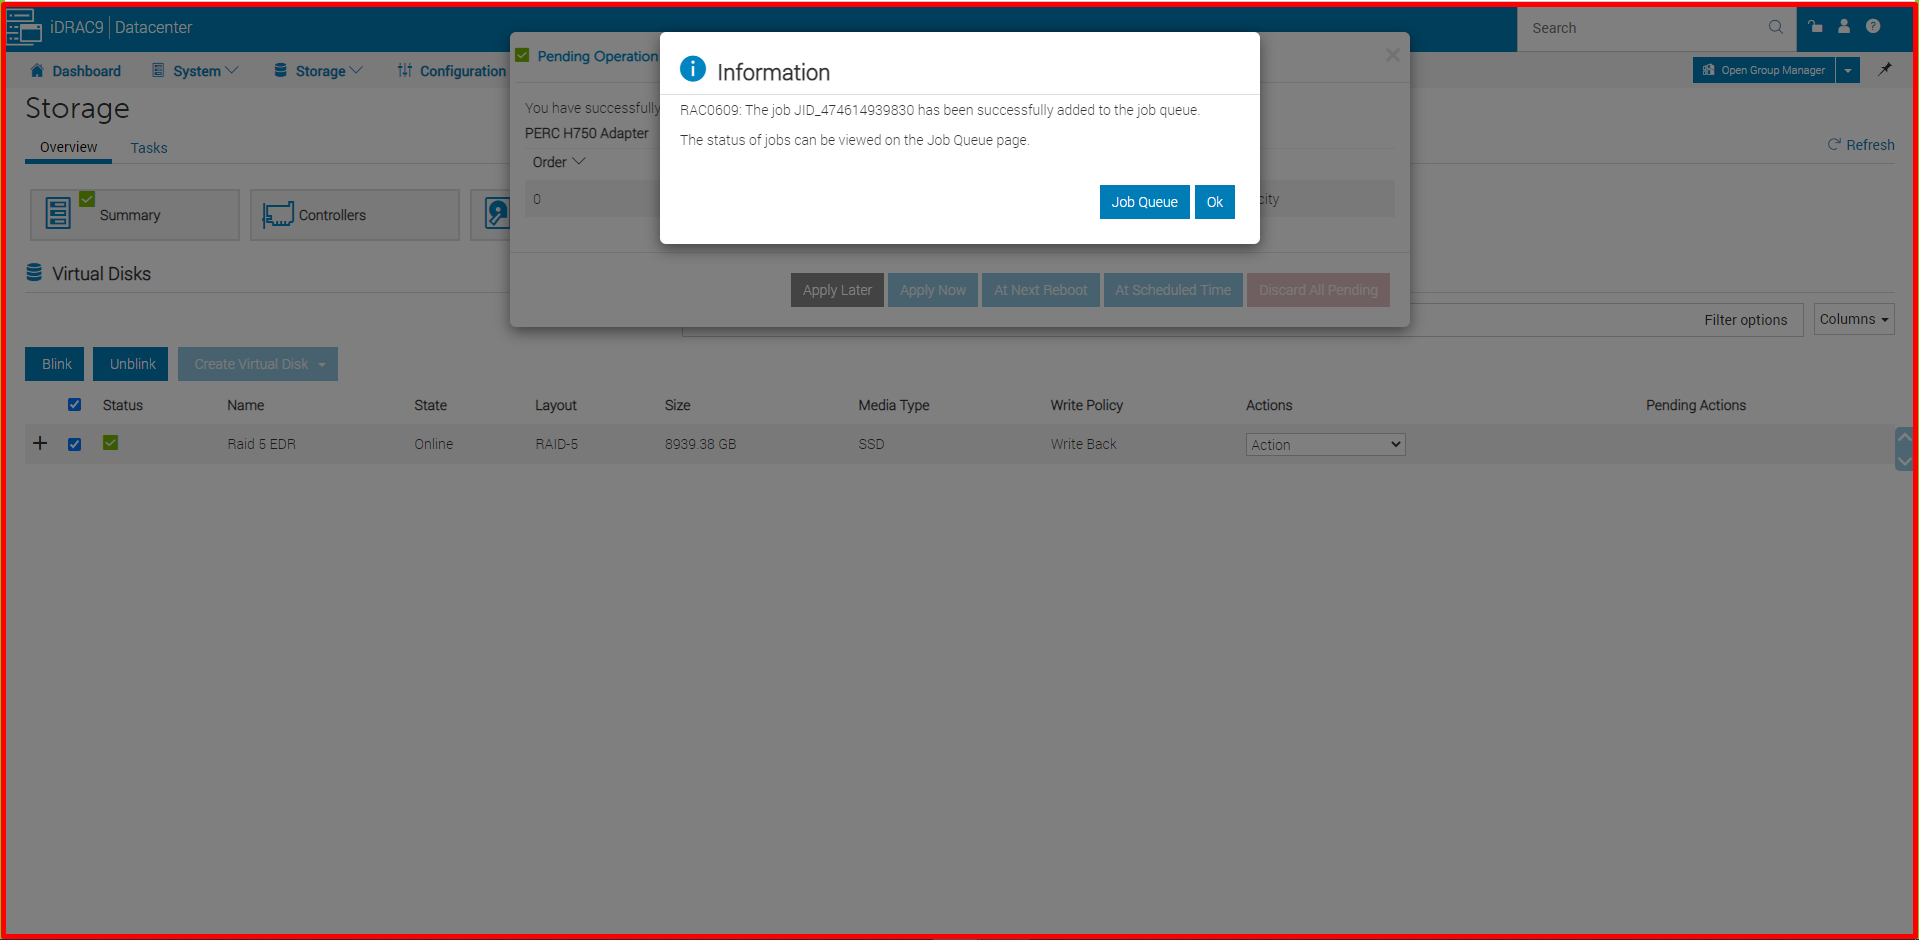
On the “Pending Operation Created” page, click the “Apply Now” button.

On the “Information” page it tells us that the disk has been successfully added. Click the “Ok” button.
Click on the “Physical Disks” section to see that our disk has been added. Our “Solid State Disk 0.1.6” appears as “Online” as “State“.

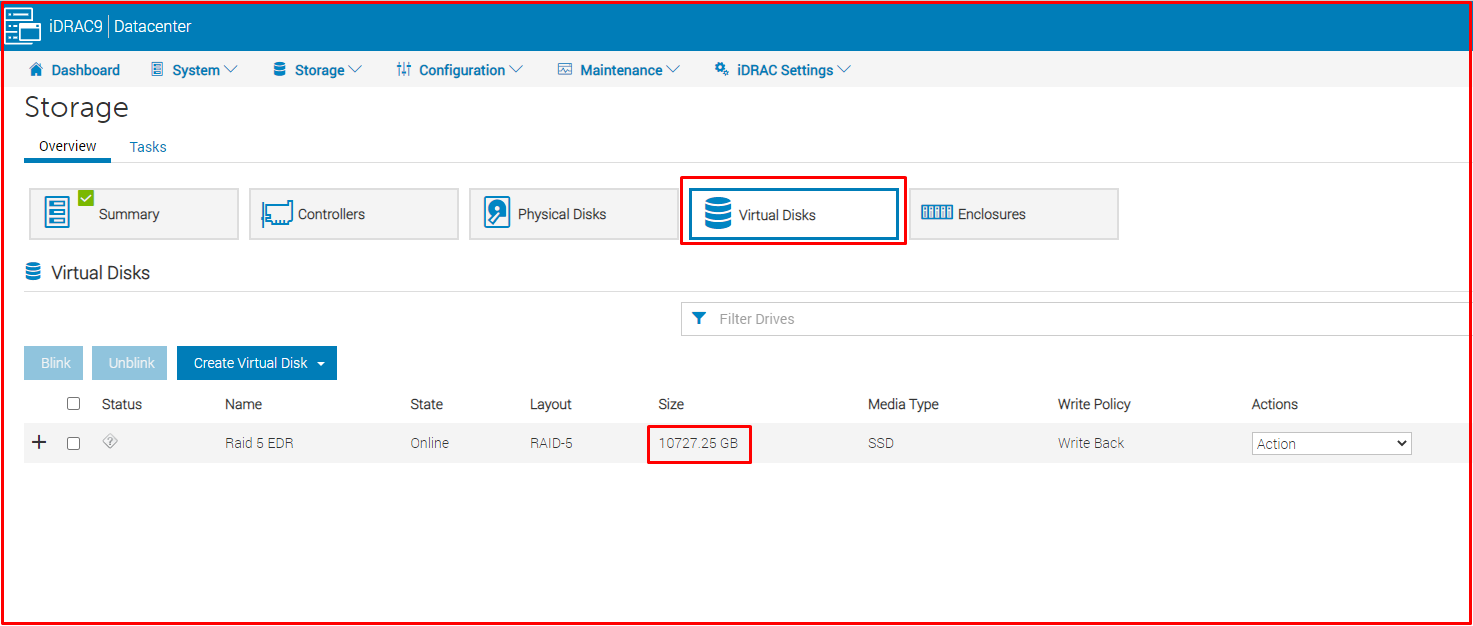
Finally, when we come to the “Virtual Disks” section, we see that the size of our total RAID 5 disks has changed. We have successfully added our disk.